
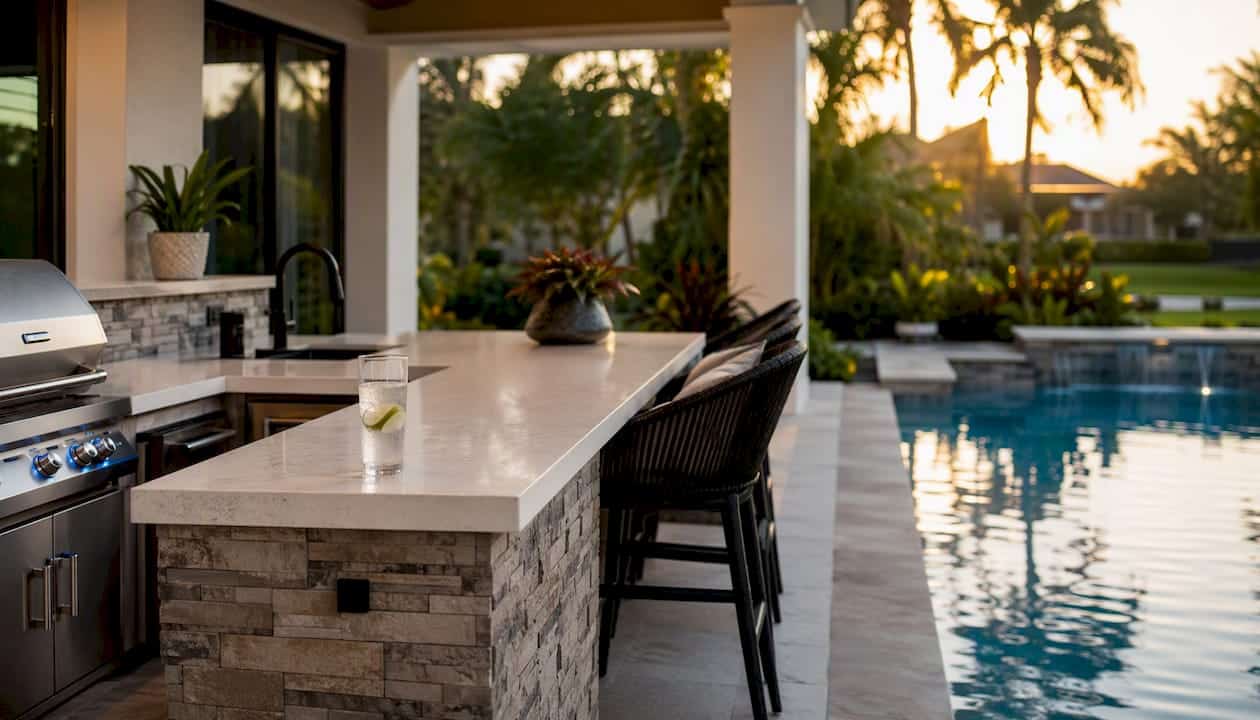
Place your outdoor kitchen 8–12 feet from the pool edge, upwind of your primary seating area, with a clear walkway of at least 4 feet between the structure and the water. That single decision, more than any appliance choice or finish selection, determines how safe, comfortable, and genuinely usable your poolside cooking space will be.
Three priorities should drive every other decision from there:
- Safety first: Keep gas appliances at least 6 feet from the pool edge per common code-influenced guidelines, and protect every outlet with GFCI within 20 feet of the water per NEC Article 680.
- Durability second: Choose materials rated for UV exposure, chlorine splash, and barefoot traffic. Standard indoor finishes fail fast outdoors.
- Social orientation third: Position the cook facing the pool so whoever is grilling stays part of the gathering, not turned away from it.
Run gas, water, and electrical lines during pool construction. Retrofitting utilities after the concrete is poured costs significantly more and disrupts a finished yard.
Key Takeaways
A well-placed, properly built outdoor kitchen by the pool pays for itself in usability, home value, and years of low-maintenance entertaining, but only if the location, materials, and utility coordination are right from the start.
| Point | Details |
|---|---|
| Clearance and placement | Position the kitchen 8–12 feet from the pool edge, upwind of seating, with at least 4 feet of clear walkway. |
| Materials matter most | Use porcelain, granite, or sealed concrete countertops; avoid indoor quartz, which yellows outdoors. |
| Run utilities once | Stub in gas, water, electrical, and spare conduit during pool construction to avoid costly retrofits later. |
| Safety is non-negotiable | GFCI-protect every outlet within 20 feet of the pool; use slip-resistant decking with a DCOF of 0.42 or higher. |
| Randrswimmingpools | Coordinates pool and kitchen utility planning in a single build phase for Central Florida homeowners. |
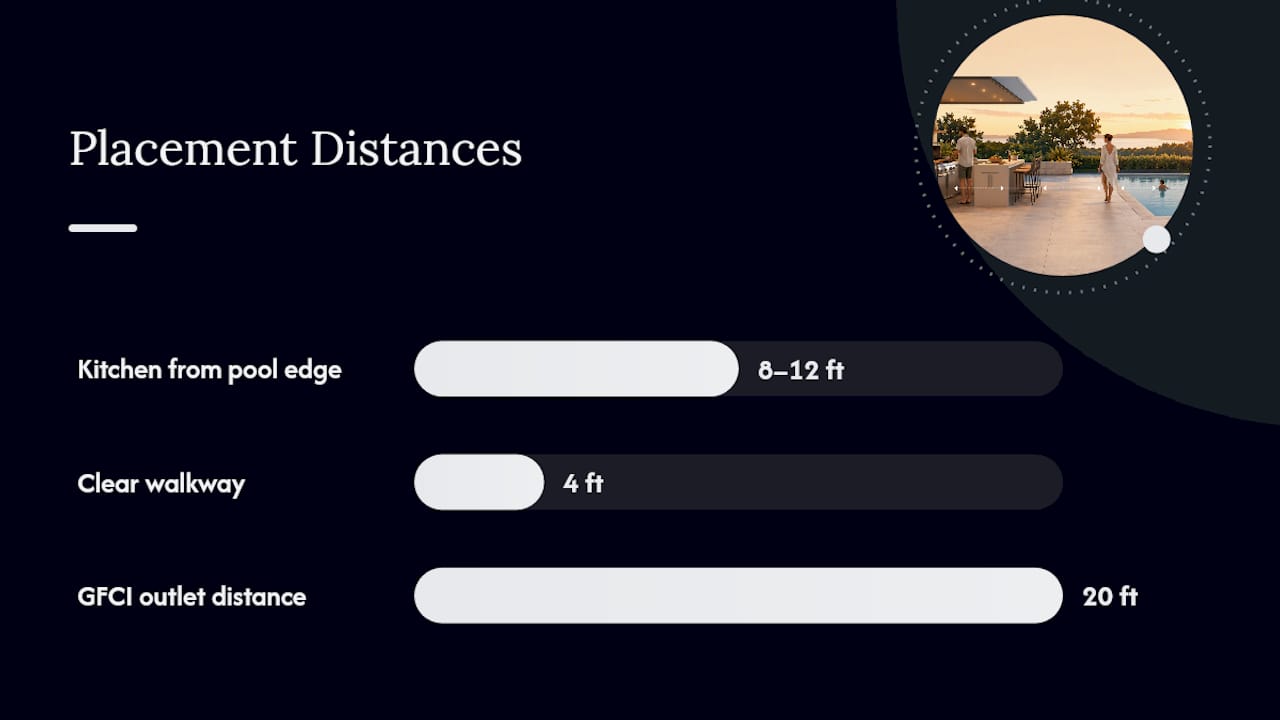
Table of Contents
- What does a great outdoor kitchen by the pool actually look like?
- Why combining an outdoor kitchen with a pool pays off
- How far from the pool should your outdoor kitchen sit?
- Which appliances should you prioritize for a poolside kitchen?
- Which materials actually hold up next to a pool?
- Planning utilities: run everything once
- Safety and code requirements you can’t skip
- What does a poolside outdoor kitchen cost?
- Seating, lighting, and making it work after dark
- How to plan and hire: a step-by-step checklist
- How Randrswimmingpools approaches poolside outdoor kitchens
- Keeping a poolside kitchen clean and functional
- Weather and seasonal planning for poolside kitchens
- Storage solutions that work in a poolside environment
- Randrswimmingpools builds pools and outdoor kitchens together in Central Florida
- Sources
What does a great outdoor kitchen by the pool actually look like?
The layout you choose shapes everything: how the space flows, how much it costs to build, and whether guests actually use it. Four configurations consistently perform well in poolside settings.
Linear/galley runs appliances along a single wall or run of cabinetry. Space-efficient and easy to permit, it works well on narrower lots or when the kitchen sits against a fence or exterior wall. The tradeoff is that the cook faces away from guests unless you add a pass-through counter on the pool side.
L-shape gives you a prep zone on one leg and a bar or serving counter on the other. Orienting the bar toward the pool keeps the cook social and gives guests a natural place to perch while watching swimmers. This is the most popular configuration for a reason.
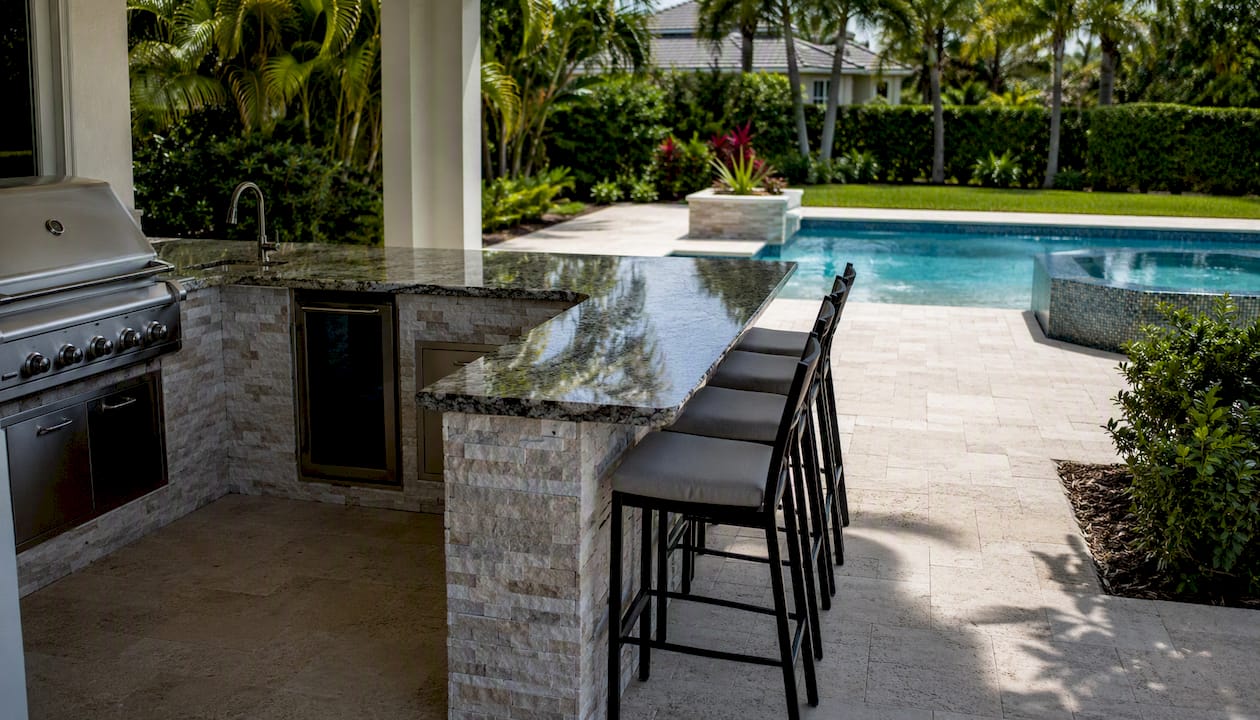
Island with bar seating puts the cooking surface at the center, surrounded by counter space and stools. It works best with generous square footage (at least 12 by 12 feet of patio) and a covered structure above. The cook becomes the focal point of the party.
U-shape maximizes counter space and storage, suited to serious entertainers who want a full outdoor work triangle. It requires the most square footage and the most utility runs, so budget accordingly.
Style-wise, a covered pavilion or pergola with a canopy transforms a poolside kitchen from a fair-weather feature into a year-round room. Modern minimal designs pair well with rectangular pools and concrete finishes. Mediterranean-inspired layouts with stucco bases and terracotta tile suit curved pools and lush landscaping. Resort-style builds, the ones with full bars, refrigerator drawers, and waterfall features, benefit from luxury pool design integration from the start of the project.
Pro Tip: Orient bar stools so seated guests face the water, not the grill hood. That one decision makes the cook feel included and gives everyone a view of the pool.
Why combining an outdoor kitchen with a pool pays off
The most obvious benefit is entertainment continuity. When the kitchen is steps from the water, guests stay poolside instead of drifting inside for drinks and snacks. Parties last longer, flow better, and feel more intentional.
Beyond the party argument, an integrated outdoor cooking space adds functional square footage to your home without adding to the footprint. On warm evenings, the patio becomes a second living room and dining room combined.
Home value is a real factor. Outdoor living improvements consistently rank among the higher-return renovation categories, and a well-designed pool and outdoor kitchen combination appeals to buyers in a way that a pool alone does not. The convenience factor alone, no more trips through the house with wet feet carrying food and drinks, changes how often families actually use the pool.
- Guests stay poolside longer, reducing foot traffic through the house.
- Hosts can supervise swimmers while cooking
- Reduces wear on indoor floors and kitchen appliances
- Creates a defined entertaining zone that photographs well for resale
How far from the pool should your outdoor kitchen sit?
The answer most designers land on: 8–12 feet from the pool edge for comfort and splash control, with a hard minimum of 6 feet for gas appliances. That buffer keeps cooking surfaces clear of routine splash, gives swimmers room to exit the pool without stepping into a hot grill zone, and satisfies most local code requirements for gas appliance clearances.
Walkway width matters as much as the setback distance. A minimum of 36 inches of clear walkway between the pool edge and any structure is the common rule of thumb, but 4–5 feet is what you actually want when hosting. Narrow passages become bottlenecks when six people are moving between the grill and the water.
Sight lines are non-negotiable. Whoever is cooking must have an unobstructed view of the pool. If your layout forces the cook to turn their back on swimmers, reconfigure before you build.
A few placement rules worth sketching before your contractor meeting:
- Place the grill upwind of the pool and primary seating to keep smoke out of guests’ faces
- Keep the sink and refrigerator on the pool-facing side so the cook faces the water
- Avoid placing the kitchen directly east of the pool if afternoon shade is a priority
- Leave at least 18 inches of counter space on each side of the grill for safety and workflow
- Mark the splash zone (roughly 3–4 feet from pool edge) and keep combustibles outside it
Pro Tip: Sketch your layout on graph paper before the contractor meeting. Mark the pool edge, the prevailing wind direction, and the sun path. A five-minute sketch prevents a $5,000 redesign.
When you’re designing the pool itself, flag the kitchen location early so utility trenching and patio grading account for both structures from day one.
Which appliances should you prioritize for a poolside kitchen?
Start with the three that earn their keep on every build, then add from there based on budget and how you actually entertain.
Must-haves:
- Built-in grill: The anchor of any outdoor kitchen. Stainless steel construction (304 grade minimum) resists corrosion from pool chemicals and humidity. Size to your typical crowd: a 36-inch grill handles most backyard parties without feeling cramped.
- Weatherproof refrigerator or beverage center: A dedicated outdoor-rated refrigerator keeps drinks cold and eliminates trips inside. Look for units rated for ambient temperatures above 110°F if you’re in a hot climate like Central Florida.
- Sink with drainage: Running water at the grill station changes how the kitchen functions. Plan the drain line during construction; adding it later means breaking concrete.
Nice-to-haves:
- Side burner: Useful for sauces, corn, and anything that doesn’t belong on the grill grates.
- Ice maker or ice bin: For pool parties, ice demand is constant. A built-in ice maker eliminates the cooler shuffle.
- Warming drawer: Keeps food at temperature while you finish grilling the next batch.
Optional upgrades:
- Pizza oven: Requires a dedicated gas line and proper ventilation clearance. Stub in the gas line during construction even if you’re not installing it immediately.
- Outdoor TV: Mount it under the covered structure, away from direct splash. Use a weatherproof enclosure rated for wet locations.
- Smoker: Best placed at the far end of the kitchen run, downwind, with maximum clearance from the pool.
Keep heat sources away from shaded seating areas and plan ventilation for any covered structure. Pool chemistry can accelerate corrosion, so specify high-quality stainless steel grades (such as 304 or 316) for materials exposed to the splash zone.
Which materials actually hold up next to a pool?
The poolside environment is harder on materials than most homeowners expect. Chlorine off-gassing, UV exposure, humidity, and barefoot traffic combine to degrade finishes that perform fine in a standard outdoor setting.
Countertops
Porcelain slab, granite, and sealed concrete are the three countertop materials that consistently perform well poolside. Porcelain resists staining, UV fading, and chemical exposure with minimal maintenance. Granite is dense and durable but requires periodic resealing. Sealed concrete offers design flexibility but needs more frequent maintenance in high-humidity climates.
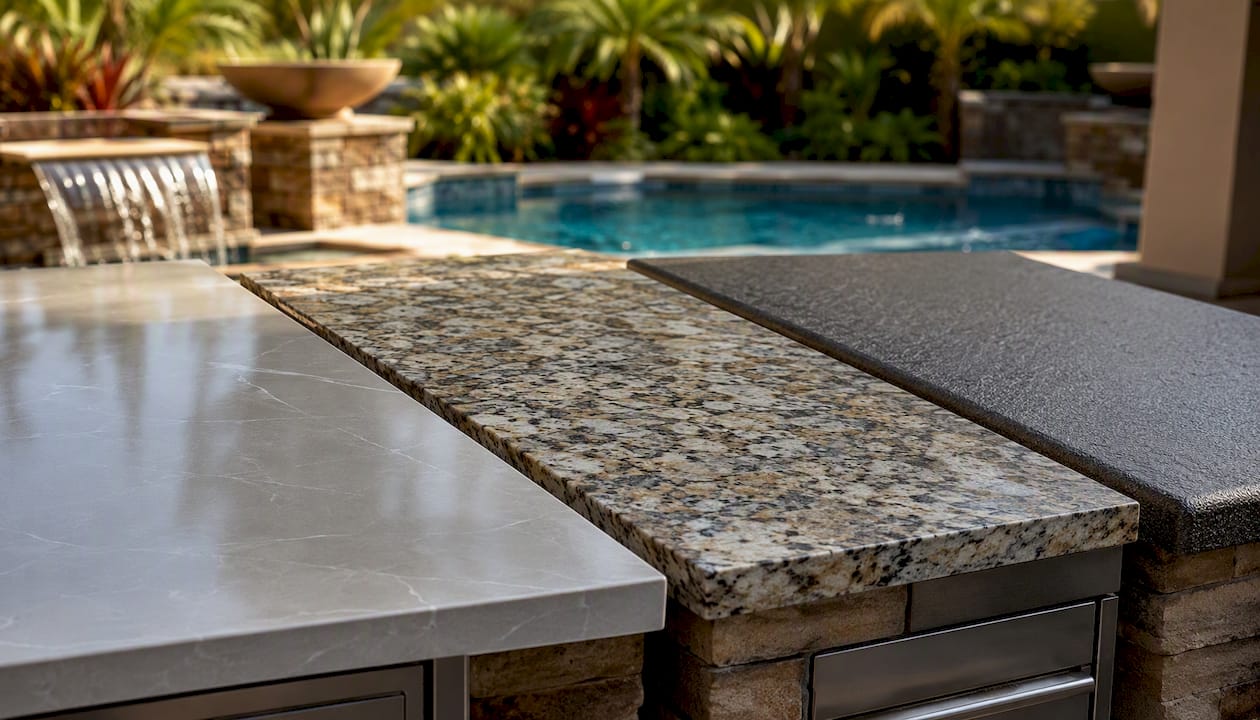
Indoor quartz is a common mistake. Most quartz formulations yellow under direct UV and are not rated for outdoor use. If a contractor proposes quartz for a poolside counter, ask for the manufacturer’s outdoor rating before agreeing.
Cabinetry
High-density polyurethane resin cabinetry and stainless-steel hardware are the two options with the strongest track record in poolside environments. Engineered HD polyurethane resin resists moisture, warping, and chlorine exposure. Stainless steel cabinets (again, 304 grade minimum) are nearly indestructible but show fingerprints and require wiping down after heavy use. Masonry builds (concrete block with tile or stucco finish) are the most durable option and the most common choice for permanent poolside kitchens in Florida.
Flooring
Slip resistance is the governing spec. Wet-area flooring needs a DCOF of 0.42 or higher; textured stone, brushed concrete, and certain porcelain pavers meet this threshold. Smooth tile, polished concrete, and most wood decking fail in wet conditions.
- Safe choices: Textured porcelain pavers, brushed concrete, natural travertine (sealed), brushed bluestone
- Avoid: Smooth ceramic tile, polished marble, untreated wood, painted concrete without anti-slip additive
Hardware and fasteners
In coastal or high-humidity settings, use 316-grade stainless fasteners throughout. Standard zinc-plated hardware corrodes within a season. Cabinet pulls, hinges, and drawer slides should all carry a marine-grade or outdoor rating.
Planning utilities: run everything once
The single most expensive mistake in a poolside kitchen build is running utilities after the pool is finished. Breaking up a concrete deck to add a gas line or drain costs far more than stubbing those lines in during the original pour.
Utilities checklist for your contractor:
- Gas line: Size for your grill plus any future appliances (pizza oven, side burner). Cap the extra stubs.
- Dedicated electrical circuits: Minimum 20-amp circuits for the refrigerator and grill ignition; separate circuits for lighting and outlets. All within 20 feet of the pool require GFCI protection.
- Outdoor-rated outlets: Weatherproof, in-use covers on every outlet. Plan locations for blender, speakers, and phone charging.
- Water supply: Hot and cold lines to the sink. Cold line stub for an ice maker if you’re phasing that in later.
- Drain and grease management: Sink drain, floor drain in the cooking zone, and a grease trap or grease management plan for the grill area.
- Conduit for future wiring: Run empty conduit to locations where you might add a TV, additional lighting, or a pizza oven. Pulling wire through existing conduit costs almost nothing; trenching later costs a lot.
Coordinate trenching with pool construction so both the pool contractor and the kitchen contractor are on site during the same ground-disturbance phase. This single scheduling decision reduces mobilization costs and avoids tearing up a finished yard twice.
Hire licensed electricians and plumbers for all utility work. NEC Article 680 governs electrical installations near pools, and most jurisdictions require licensed trades for gas line work. Unpermitted utility work can create problems at resale.
Safety and code requirements you can’t skip
A poolside outdoor kitchen sits at the intersection of three separate code domains: pool electrical codes, gas appliance codes, and building codes for outdoor structures. Each has its own requirements, and they don’t always align neatly.
Non-negotiable checklist:
- GFCI protection: Every outlet, switch, and fixture within 20 feet of the pool requires GFCI protection per NEC Article 680. No exceptions.
- Gas appliance clearances: Maintain at least 6 feet between gas appliances and the pool edge; follow manufacturer clearance specs for combustible structures (typically 12–18 inches minimum from cabinetry).
- Minimum walkways: 36 inches clear minimum between the kitchen structure and the pool edge; 48–60 inches for hosting.
- Slip-resistant decking: DCOF of 0.42 or higher for all wet-area flooring.
- Propane storage: Store propane tanks upright, in a ventilated enclosure, away from heat sources and pool equipment. Natural gas hookups eliminate this concern entirely.
- Covered structure permits: Pergolas, pavilions, and shade structures typically require a separate building permit. Check with your local building department before construction begins.
Pull permits before breaking ground. Many jurisdictions require separate permits for the electrical, gas, plumbing, and structural components of an outdoor kitchen. Your contractor should handle permit coordination, but verify this is in the contract scope before signing.
What does a poolside outdoor kitchen cost?
Cost ranges vary widely based on size, materials, appliances, and whether you’re adding a covered structure. As a general framework based on typical project scopes:
- Simple builds (masonry base, basic grill, no covering): starting costs can be modest, but even entry-level permanent installations involve material and labor costs that add up quickly.
- Mid-range builds (L-shape or island layout, quality appliances, pergola): typically fall in the mid-five-figure range.
- Luxury integrated projects (full kitchen, premium appliances, pavilion, stonework): exceed $50,000, often significantly, when combined with a custom pool build.
The biggest cost drivers, in rough order of impact:
- Covered structure (pergola, pavilion, or full roof): adds $10,000–$30,000+ depending on materials and size.
- Appliances: a quality built-in grill alone runs $1,500–$5,000+; a full appliance package multiplies quickly
- Countertop material: porcelain slab and granite cost more upfront but save on replacement
- Utility runs: the further the kitchen sits from the house, the more trenching costs
Where to spend: Grill quality, countertop durability, and shade coverage. These three affect daily usability more than any other line item.
Where to save: Phase in the pizza oven, smoker, and outdoor TV by stubbing utilities now and installing appliances later.
Timeline for a combined pool and kitchen project: permits typically take 2–6 weeks depending on jurisdiction. Ground work, trenching, and slab pour run 2–4 weeks. Pool construction runs 8–16 weeks for a custom concrete pool. Kitchen framing, appliance install, and finish work add 3–6 weeks after the pool deck is cured. Total project time for a coordinated build: 4–6 months is realistic for a custom concrete pool with an integrated outdoor kitchen.
Seating, lighting, and making it work after dark
A poolside kitchen that shuts down at sunset is only half a kitchen. Lighting and seating design determine whether the space works for evening entertaining.
Seating dimensions that actually work:
- Bar-height counter: 42 inches from finished floor to counter surface
- Stool spacing: 24 inches per seat, center to center
- Knee clearance: minimum 12 inches of overhang for comfortable seating
- Sight line: bar stools should face the pool, not the grill hood
Layered lighting checklist:
- Task lighting directly over the grill and prep counter (under-canopy LED strips or recessed fixtures)
- Ambient lighting under the pergola (string lights, pendant fixtures, or recessed downlights)
- Pathway lights from the house to the kitchen and along the pool edge
- Waterproof landscape fixtures for the surrounding planting beds
- Pool lighting for nighttime swimming safety
LED fixtures are the practical choice for outdoor kitchens: they run cool, resist moisture better than incandescent options, and consume far less power over a season of evening entertaining. For Central Florida homeowners, the pool lighting guide from Randrswimmingpools covers safe and effective upgrade options specific to the region.
Entertainment add-ons: Mount the TV under the covered structure, angled away from direct water spray. For audio, zone the pool area and the kitchen separately so you can adjust volume without blasting one zone. Place speaker controls and outlet clusters at counter height, not at floor level where splash is more likely.
How to plan and hire: a step-by-step checklist
Planning steps before you talk to a contractor
- Site survey: Walk the yard and mark the pool location, prevailing wind direction, sun path, and existing utility entry points.
- Schematic layout: Sketch two or three layout options (linear, L-shape, island) and note which one preserves sight lines to the pool.
- Utilities plan: Identify where gas, water, and electrical will originate and the approximate trench route to the kitchen location.
- Permit research: Call your local building department and ask what permits are required for an outdoor kitchen, gas line, and covered structure on your property.
- Budget range: Set a realistic range before contractor meetings so you can evaluate proposals against a fixed ceiling.
- Appliance list: Decide on must-haves now and nice-to-haves later; share this list with every contractor you interview.
Contractor interview questions
- How many poolside outdoor kitchens have you built, and can you show photos of completed projects?
- Who coordinates between the pool contractor, electrician, plumber, and kitchen builder?
- How do you handle utility trenching when a pool is being built simultaneously?
- What warranty do you offer on labor and on the appliances you supply?
- Which permits do you pull, and who is responsible if an inspection fails?
Red flags to watch for
- No permit plan or vague answer about who pulls permits
- Unwillingness to provide references from combined pool and kitchen projects
- No written construction schedule with milestone dates
- Proposal that doesn’t address utility coordination with the pool contractor
- Pressure to sign before you’ve seen a detailed scope of work
Before you sign
- Confirm the appliance list, model numbers, and warranty terms are in the contract
- Verify materials are specified by grade (304 vs. 316 stainless, specific countertop material)
- Confirm all utility stubs for future features are included in scope
- Get a written maintenance and warranty schedule for countertops and cabinetry
How Randrswimmingpools approaches poolside outdoor kitchens
Building custom pools in Central Florida since 1985 means Randrswimmingpools has worked through the specific challenges that Florida’s humidity, UV intensity, and afternoon thunderstorms create for poolside structures. A few practical lessons from that experience:
- Trench once. When the pool excavation is open, that’s the time to run gas, water, and electrical conduit to the kitchen location. Randrswimmingpools coordinates this with the kitchen contractor so both trades work from the same utility plan.
- Stub in spare conduit. Every poolside kitchen build includes capped conduit runs to locations where a future TV, pizza oven, or additional lighting might go. The cost at construction is minimal; the cost of adding it later is not.
- Material choices for Florida: In Central Florida’s climate, masonry bases with porcelain countertops and HD polyurethane resin cabinetry consistently outperform wood-framed or standard outdoor cabinet builds. The combination handles humidity, afternoon rain, and pool chemical exposure without warping or fading.
Portfolio photos and project case studies are available on the Randrswimmingpools website. If you’re planning a combined pool and kitchen project, a site review early in the process, before you’ve committed to a layout, saves significant redesign cost later.
Keeping a poolside kitchen clean and functional
Poolside kitchens accumulate a specific combination of grime: sunscreen residue, chlorine residue, grease, and organic debris from surrounding landscaping. Standard kitchen cleaning routines don’t fully address this mix.
Wipe down countertops after every use with a pH-neutral cleaner. Chlorine and acidic cleaners degrade sealants on granite and concrete faster than normal weathering. Reseal granite and concrete countertops annually in high-use environments; porcelain requires no sealing but benefits from a periodic deep clean with a non-abrasive tile cleaner.
Clean the grill grates and grease management system after every session. Grease left in a poolside grill attracts insects and can create a fire hazard faster than in a covered indoor kitchen, because poolside airflow is less predictable.
Stainless steel surfaces need a wipe-down with a dedicated stainless cleaner every few weeks to prevent chlorine pitting. Wipe in the direction of the grain. Cabinet hardware and drawer slides should be inspected seasonally and lubricated with a silicone-based lubricant.
Weather and seasonal planning for poolside kitchens
Central Florida’s weather pattern is specific: intense UV from March through October, daily afternoon thunderstorms from June through September, and occasional cold snaps from December through February. A poolside kitchen needs to account for all three.
A covered structure, whether a pergola, pavilion, or full roof, is not optional in this climate. It protects appliances from direct rain, reduces UV degradation on countertops and cabinetry, and makes the kitchen usable during the brief afternoon storms that otherwise shut down outdoor entertaining.
For the winter months, even in Florida, cover the grill and refrigerator with weatherproof appliance covers when the kitchen won’t be used for more than a week. Disconnect and store propane tanks per manufacturer guidelines if temperatures are expected to drop below freezing.
Pool chemical exposure is a year-round concern. Chlorine off-gassing is highest on warm, still days. Position the kitchen upwind of the pool and keep the kitchen area well-ventilated to reduce the concentration of chlorine vapor around food prep surfaces. Salt chlorinator systems produce lower ambient chlorine levels but accelerate corrosion on metal surfaces, making 316-grade stainless a stronger choice for coastal or salt-system pools.
Storage solutions that work in a poolside environment
Storage in a poolside kitchen serves double duty: it needs to hold cooking supplies and pool supplies, often in the same footprint.
Waterproof cabinetry is the baseline requirement. HD polyurethane resin cabinets and stainless-steel cabinets both handle moisture without warping. Avoid MDF-core outdoor cabinets marketed as “weather-resistant” but not fully waterproof; the cores absorb moisture at joints and edges over time.
Dedicate one cabinet run to pool supplies: chemical test kits, skimmer brushes, and small maintenance tools. Keep these separate from food storage with a physical divider or a lockable cabinet if children are present. Locking storage is worth specifying if you store pool chemicals in the outdoor kitchen area.
For kitchen supplies, deep drawers with full-extension slides work better than shelves in outdoor environments because they keep contents off the cabinet floor where moisture pools. Line drawer bottoms with a removable, washable liner.
Under-counter refrigerator drawers double as beverage storage and eliminate the need for a separate full-size refrigerator in smaller kitchen footprints. Specify units with a drain port so condensation doesn’t accumulate inside the cabinet cavity.
The team’s perspective on what homeowners get right and wrong
Most homeowners come to us with a clear vision of the appliances they want and a vague idea of where the kitchen should go. That’s usually backwards. Location, sight lines, and utility coordination are the decisions that determine whether the project succeeds. Appliances can be upgraded; a kitchen built in the wrong spot is expensive to move.
The three priorities we consistently push: durability of materials over aesthetics (a beautiful countertop that degrades in two seasons is a poor investment), unobstructed sight lines from the cook’s position to the pool, and utility coordination during pool construction. Homeowners who get those three right end up with kitchens they use constantly. Those who skip the coordination step often call us back to help fix a retrofit that costs more than getting it right the first time would have.
If you’re in the planning stage, the most valuable thing you can do before talking to a contractor is walk your yard at different times of day, note where the sun hits and where the wind comes from, and sketch a rough layout. Bring that sketch to your first contractor meeting. It focuses the conversation and saves everyone time.
Randrswimmingpools builds pools and outdoor kitchens together in Central Florida
R and R Swimming Pools has been building custom inground pools across Central Florida since 1985, and coordinating the pool build with outdoor kitchen utility planning is a core part of how the team works. The practical payoff: one trenching mobilization, one coordinated permit package, and a finished yard that doesn’t get torn up twice.
The team handles custom concrete pool design and construction, coordinates outdoor kitchen utility stubs during pool construction, and advises on material selections that hold up in Florida’s climate. Whether you’re starting from a blank yard or adding a kitchen to an existing pool, the Central Florida pool installation guide covers the full process. For a combined pool and kitchen project, the custom pool installation guide walks through how Randrswimmingpools coordinates the build from site survey to final inspection. Licensed trades handle all electrical, gas, and plumbing work. Request a site review and get a quote at Randrswimmingpools.
Sources
The recommendations in this article draw on the following resources. For jurisdiction-specific code requirements, always verify with your local building department.
- Outdoor Kitchen With Pool | Outdoor Kitchen Setup
- Outdoor Kitchen Ideas: Build the Ultimate Poolside Entertaining Space
- Outdoor kitchen pool design: 5 Ultimate Ideas
- Best Materials for Poolside Outdoor Kitchens – Luxury Pools + Outdoor Living
- Outdoor Pool Kitchen: The Complete Homeowner’s Design & Build Guide for 2026
