
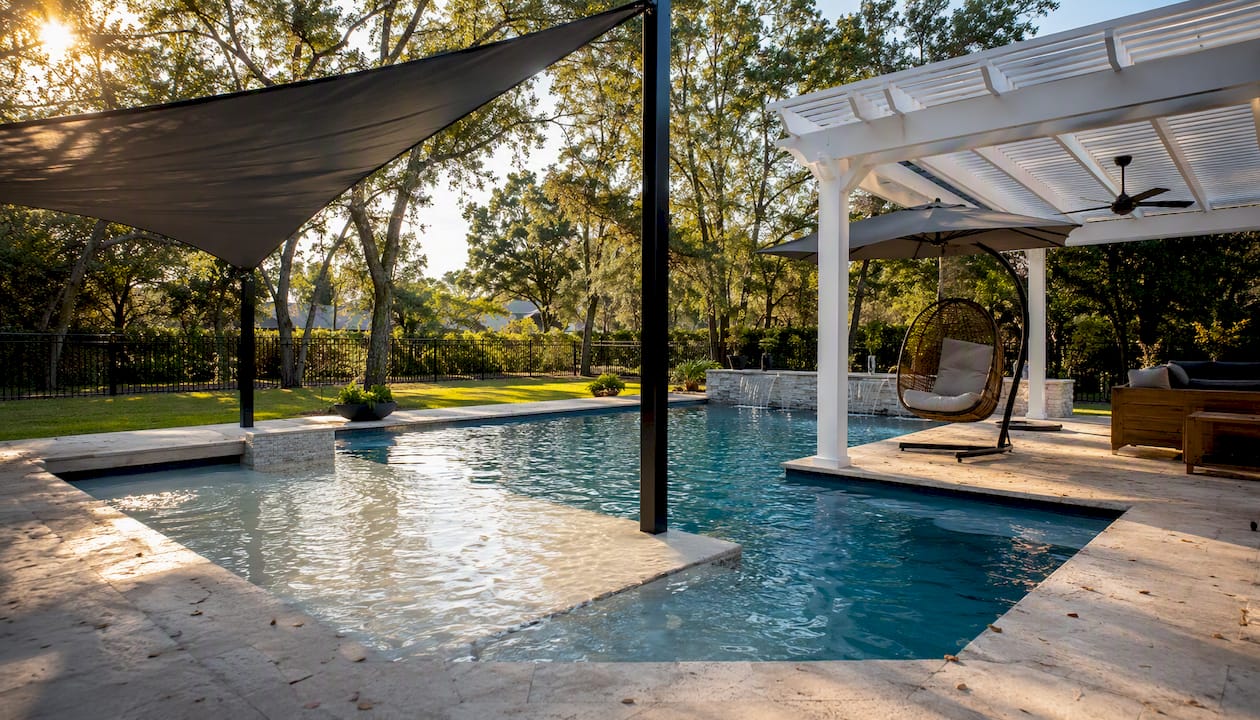
For most backyard pools, the best shade solutions are cantilever umbrellas, shade sails, pergolas, retractable awnings, and layered landscaping. Each serves a different need:
- Cantilever umbrellas are the go-to for flexible lounge coverage with zero permanent commitment. DIY-friendly, movable, no permit required.
- Shade sails cover large deck areas with a modern, airy look. Simple DIY install if you have solid anchor points; a pro helps with engineered posts.
- Pergolas deliver permanent, architectural shade for dining or lounge zones and integrate cleanly with lighting and fans. Requires a contractor and often a permit.
- Retractable awnings let you control sun exposure on demand, ideal for covered patio edges. Professional install standard.
- Landscaping and trees provide natural, view-preserving shade over time. DIY-friendly for potted plants; larger trees need planning for root proximity to the pool.
- Pavilions and cabanas offer full-coverage, resort-style shelter. Always a pro job with footings, drainage, and often electrical.
The rule of thumb: shade the people, not the whole pool. Shading the entire water surface can make the water feel colder and trap debris. Target your lounge chairs, dining area, and shallow entry instead.
Key Takeaways
The most effective pool shade strategy targets high-use zones like lounge chairs and dining areas rather than the entire pool surface, combining a permanent structure with flexible umbrellas for full coverage.
| Point | Details |
|---|---|
| Target people, not the pool | Shade lounge chairs, dining areas, and shallow entry points; shading the whole pool cools the water and traps debris. |
| Match permanence to budget | Umbrellas and shade sails suit flexible, lower-cost needs; pergolas and pavilions deliver long-term value but require permits and pro installation. |
| Specify 316-grade stainless hardware | Standard hardware corrodes quickly in chlorinated environments; marine-grade stainless at every connection point extends structure lifespan significantly. |
| Integrate shade during the pool build | Planning shade from day one avoids cutting finished concrete, conceals wiring cleanly, and produces a more cohesive design at lower total cost. |
| Randrswimmingpools | Offers full-scope pool and shade integration in Central Florida, from design through installation, with a free consultation to start. |
Table of Contents
- 12 Pool Shade Ideas Worth Considering for Your Backyard
- DIY Pool Shade Installs You Can Actually Do Yourself
- Materials and Fabrics That Hold Up Around Pools
- How to Position Shade for Maximum Comfort Without Blocking Views
- Wind, Anchors, Building Codes, and When to Hire a Pro
- Typical Costs and Maintenance Expectations for Each Shade Type
- How to Choose the Right Shade Solution and What to Ask a Contractor
- Why Integrating Shade Into a New Pool Build Makes Sense
- Lighting and Electrical Integration With Shade Structures for Evening Use
- Why Randrswimmingpools Recommends Building Shade Into the Pool Plan
- Randrswimmingpools Builds Shaded Pool Areas From the Ground Up
- Sources
12 Pool Shade Ideas Worth Considering for Your Backyard
Sun Shades For Pools — SwimFastLane makes a useful point: pergolas, cantilever umbrellas, and shade sails each solve a different problem. Knowing which problem you actually have is what makes the choice obvious.
1. Standard market umbrellas
A classic 9-foot or 11-foot market umbrella on a weighted base. Inexpensive, portable, and available at any home improvement store.
- Pros: Low cost, zero installation, easy to reposition.
- Con: Limited coverage area; tips in wind if the base is undersized.
- Best for: A single lounge chair or small bistro table.
- DIY or pro: Fully DIY.
Photo callout: wide shot showing umbrella next to a chaise lounge, close-up of the weighted base, context shot showing scale against the pool edge.
2. Cantilever (offset) umbrellas
A side-post design that keeps the center of the shade area pole-free. The arm extends 10–13 feet, covering a wider seating group without obstruction.
- Pros: No center pole blocking the space; most models rotate 360 degrees.
- Con: Requires a heavy base or a bolted anchor for stability.
- Best for: Lounge groupings of 4–6 chairs, outdoor dining sets.
- DIY or pro: DIY with a weighted base; pro anchoring recommended for permanent installs.
Photo callout: overhead view showing coverage radius, close-up of the pivot mechanism, wide shot of a dining group underneath.
3. Shade sails
Tensioned fabric panels stretched between anchor points at different heights to create a geometric canopy. Shade sails for pools work especially well when layered at varying heights, which creates dynamic coverage while preserving sightlines.
- Pros: Modern aesthetic; breathable mesh reduces heat buildup; can cover large irregular areas.
- Con: Requires solid anchor points (walls, posts, or trees); tension must be re-checked seasonally.
- Best for: Large deck areas, modern-style backyards, homeowners who want to preserve the open-sky feel.
- DIY or pro: DIY for simple two- or three-point installs; pro for engineered posts set in concrete.
Photo callout: wide shot showing overlapping triangular sails, close-up of the corner hardware and turnbuckle, context shot showing the pool visible beneath.
Shade sails layered at different heights can cover a large deck while keeping the pool visible from the house — a detail that matters more than most homeowners realize until they’ve blocked the view with a solid roof.
4. Attached pergolas
A pergola bolted to the house or a freestanding structure with open-beam rafters. Provides dappled shade and a permanent architectural anchor for the outdoor space.
- Pros: Permanent, attractive, integrates with lighting and fans; adds property value.
- Con: Fixed footprint; typically requires a building permit and concrete footings.
- Best for: Covered dining or lounge zones adjacent to the house.
- DIY or pro: Pro install for anything with footings or electrical.
Photo callout: wide shot showing the pergola over a dining table with the pool in the background, close-up of beam joinery, context shot showing scale against the house.
5. Motorized pergolas
A pergola with adjustable louvers or a retractable roof panel controlled by a remote or app. You dial in exactly how much sun or shade you want, and the structure closes fully during rain.
- Pros: Maximum flexibility; weather-responsive; premium aesthetic.
- Con: Higher cost than a standard pergola; requires electrical and professional installation.
- Best for: Homeowners who want a year-round outdoor room, not just a shade structure.
- DIY or pro: Always pro.
Photo callout: split image showing louvers open vs. closed, close-up of the motorized track, wide shot showing the full structure over a pool deck.
6. Freestanding pavilions and open cabanas
A four-post roofed structure set away from the house, typically over a lounge or bar area. Open sides keep airflow while the roof provides full overhead coverage.
- Pros: Full overhead protection; can include fans, lighting, and a bar setup; no house attachment needed.
- Con: Requires engineered footings; larger footprint; permit almost always required.
- Best for: Full-coverage entertaining zones, resort-style backyards.
- DIY or pro: Pro only.
Photo callout: wide shot showing the pavilion with pool visible beyond, close-up of the roofing material, context shot showing the structure’s scale.
7. Retractable awnings
A fabric awning on a motorized or manual arm that extends from the house wall or a freestanding frame. Retracts completely when not in use.
- Pros: On-demand shade; protects the fabric when retracted; clean look when closed.
- Con: Limited projection (typically 10–18 feet); requires a solid mounting surface.
- Best for: Covered patio edges, transitional zones between the house and pool.
- DIY or pro: Professional install standard for motorized versions.
Photo callout: wide shot showing awning extended over a patio, close-up of the motor housing, context shot showing the retracted position.
8. Single-post cantilever shade structures
A commercial-style shade sail on a single engineered post, often seen at aquatic centers. The arm extends 12–20 feet with a tensioned fabric panel.
- Pros: Covers a large area from one anchor point; no obstruction under the shade.
- Con: Post must be set in a substantial concrete footing; engineered design required.
- Best for: Pool decks where you want maximum coverage without multiple posts.
- DIY or pro: Always pro.
Photo callout: wide shot showing the arm and coverage area, close-up of the post base, context shot showing scale against pool users.
9. Permanent roofed pool houses
A fully enclosed or semi-enclosed structure with a solid roof, walls, and often HVAC, a bathroom, and storage. The most substantial shade option.
- Pros: Year-round usability; adds significant property value; full weather protection.
- Con: Highest cost and longest build timeline; always requires permits and a general contractor.
- Best for: Homeowners planning a long-term outdoor living investment.
- DIY or pro: General contractor and architect required.
Photo callout: exterior wide shot showing the pool house with pool, interior shot showing the space, close-up of the roofline detail.
10. Layered landscaping and trees
Strategically placed trees, tall shrubs, or climbing plants on trellises provide natural shade that grows over time. Palms, crape myrtles, and clumping bamboo are common choices near pools.
- Pros: Natural aesthetic; improves privacy; no permit required for most plantings.
- Con: Slow to mature; roots can threaten pool structure if planted too close; leaf debris in the pool.
- Best for: Homeowners with a longer timeline and a naturalistic design preference.
- DIY or pro: DIY for potted or small plantings; landscape contractor for large trees.
Pro Tip: Plant trees at least 10–15 feet from the pool edge to keep roots away from the shell and plumbing. Deciduous trees on the west side give afternoon shade in summer and let winter sun through when you want it.
For ideas on landscape integration in luxury pools, the design approach matters as much as the plant selection.
Photo callout: wide shot showing mature trees framing the pool, close-up of a planted privacy hedge, context shot showing the dappled shade pattern on the water.
11. Living privacy hedges
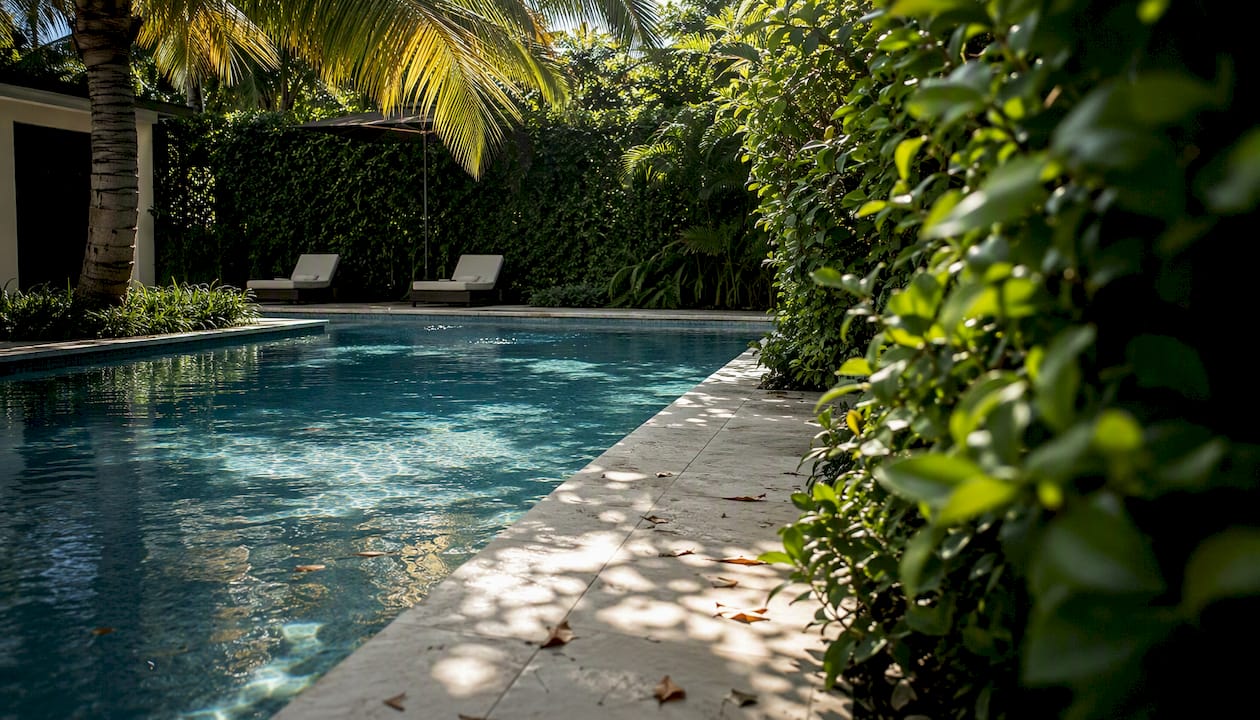
Dense evergreen hedges (arborvitae, clusia, podocarpus) planted along the pool perimeter serve double duty: privacy screening and low-angle sun blocking.
- Pros: Year-round coverage; natural look; no structural permit needed.
- Con: Takes 2–5 years to reach effective height; requires regular trimming.
- Best for: Side-yard sun and privacy combined, especially for afternoon western exposure.
- DIY or pro: DIY planting; landscape contractor for large-scale installs.
Photo callout: wide shot showing a hedge line along a pool fence, close-up of the foliage texture, context shot showing the privacy effect from inside the pool.
12. Floating pool shade panels
Small, buoyant shade discs or panels that float on the water surface, blocking direct sun on the water itself. More of a supplemental tool than a primary shade solution.
- Pros: Inexpensive; no installation; reduces water temperature and evaporation.
- Con: Minimal coverage; moves with wind and swimmers; purely functional, not decorative.
- Best for: Temporary sun reduction on the water surface, especially for children’s play areas.
- DIY or pro: Fully DIY.
Photo callout: close-up of the floating panels on water, wide shot showing coverage proportion, context shot showing a child playing nearby.
DIY Pool Shade Installs You Can Actually Do Yourself
DIY shade solutions are generally limited to non-permanent options like umbrellas and shade sails. Anything with concrete footings, roofing, or electrical crosses into professional territory for both safety and code reasons.
Here is a practical step-by-step for a DIY shade sail install, the most common homeowner project:
- Map your sun angles. Stand in your main lounge area at 2 PM and 4 PM on a sunny day. Note where the sun hits hardest. That is where your shade sail needs to cover, not the whole pool.
- Identify anchor points. You need at least three solid attachment points: a house wall, a fence post, or a freestanding post you set yourself. Each point must handle the tension load, which can exceed 200 pounds on a large sail in wind.
- Set freestanding posts if needed. Use 4-inch steel or aluminum posts set in concrete at least 24 inches deep. Let the concrete cure for 48–72 hours before tensioning the sail.
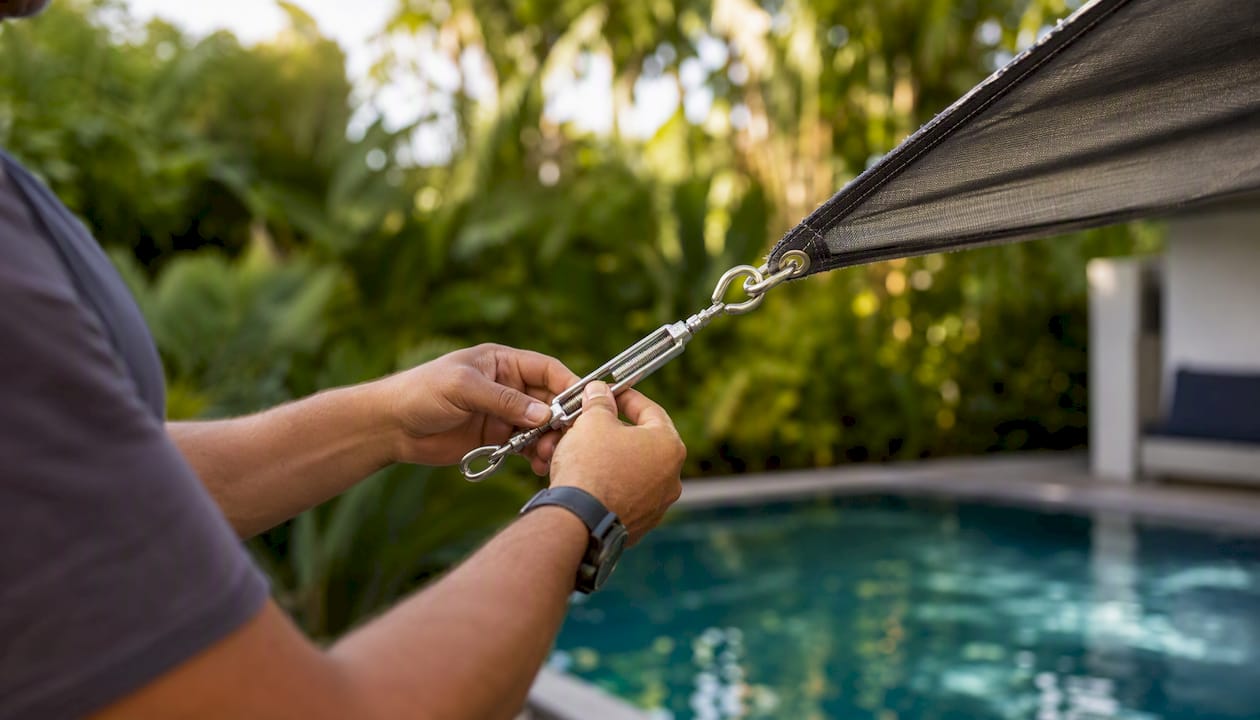
- Select the right hardware. Use stainless steel D-rings, turnbuckles, and snap hooks rated for the sail’s load. Galvanized hardware corrodes quickly in a pool environment.
- Attach and tension the sail. Start with the highest anchor point, then work to the lower corners. Use the turnbuckles to apply even tension across all edges. The sail should be taut with no sagging center.
- Safety check. Tug each corner hard. Check that every attachment point is solid. Look for any fraying at the sail’s corner rings.
- Plan for storms. Know how to detach the sail quickly. Most manufacturers recommend removing shade sails when sustained winds exceed 25 mph.
Budget tips: Pre-made shade sail kits from home improvement stores run $50–$300 depending on size. Custom-cut sails cost more but fit irregular spaces better. Reusing existing fence posts or a pergola frame as anchor points saves the most money.
Pro Tip: The single biggest DIY mistake is under-tensioning. A loose sail flaps in wind, stresses the corner hardware, and tears faster than a properly tensioned one. If the center sags more than a few inches, tighten the turnbuckles.
Materials and Fabrics That Hold Up Around Pools
Chlorine, UV, humidity, and salt air are hard on almost every material. Choosing the wrong fabric or frame finish means replacing your shade structure in two or three years instead of ten.
Fabrics worth specifying:
- HDPE mesh (high-density polyethylene): The standard for shade sails. Breathable, UV-stabilized, and resistant to mold. Look for a UV block rating of 90% or higher for poolside use. Commercial fabric systems can block up to 98% of UV when specified for that performance level.
- Solution-dyed acrylic (Sunbrella and similar): The benchmark for awnings and pergola covers. Color is baked into the fiber, so it resists fading far longer than surface-dyed fabrics. Water-resistant but not waterproof; drains rather than pools.
- PVC-coated polyester membrane: Fully waterproof, used on motorized pergola roofs and retractable systems. Heavier than mesh, but handles rain without sagging.
Frame and hardware choices:
- Aluminum: The best default for pool environments. Lightweight, corrosion-resistant, and available in powder-coated finishes that hold up well in humid conditions.
- Powder-coated steel: Strong and cost-effective, but the coating must be intact. Any chip or scratch invites rust. Use stainless fasteners even on steel frames.
- 316-grade stainless steel hardware: The standard for wet and chlorinated environments. Use it for every bolt, nut, and D-ring that touches the structure. Standard 304 stainless corrodes faster in chlorinated air.
For more on how materials perform in humid conditions, the pool material durability guide covers what holds up over the long term.
Maintenance signals to watch for:
- Fabric tension loosening (re-tension or replace hardware annually)
- White or orange staining on frame joints (early corrosion; clean and treat immediately)
- Fabric surface pilling or UV degradation (replace when UV block rating drops noticeably)
- Hardware seizing at pivot points (lubricate with a marine-grade lubricant twice a year)
Pro Tip: Inspect all hardware connections at the start and end of each swim season. A corroded turnbuckle or a cracked D-ring is a $10 fix before it fails and a $500 sail replacement after.
How to Position Shade for Maximum Comfort Without Blocking Views
Shade placement is where most homeowners make their biggest mistake: they try to shade the entire pool and end up with a cold, dark backyard. Targeting shade over high-use zones — loungers, dining areas, and shallow entry points — gives you comfort without turning the pool into a shaded pond.
Reading sun angles:
The sun tracks from east to west, but the angle that matters most for pool comfort is the afternoon arc from the southwest. That is when UV intensity peaks and when most families are actually swimming. Position your primary shade structure on the west or southwest side of the lounge area, not directly over the pool.
Practical placement guidelines:
- Mount shade structures higher than you think you need. A sail or pergola at 10–12 feet preserves sightlines from the house and allows airflow underneath, which makes the shaded area feel cooler than a low-hung cover.
- Layer overhead shade with side protection for late-afternoon sun. A shade sail handles midday overhead glare; a privacy hedge or roller shade on the western fence handles the low-angle 4–6 PM sun that slides under any overhead structure.
- Keep the pool’s shallow entry and tanning ledge in partial sun if possible. Full shade over a tanning ledge defeats its purpose. A tanning ledge design works best when the shade structure stops at the pool edge, not over the water.
- Use open-design pergolas and mesh sails rather than solid roofs near the pool. They preserve the view from inside the house, allow rain to pass through, and reduce wind load on the structure.
A simple sun-path sketch: Draw your pool and deck from above. Mark where the sun is at 10 AM, 2 PM, and 4 PM in July (your worst-case scenario). Shade the 2 PM and 4 PM zones first. That sketch takes ten minutes and prevents a misplaced structure.
Pro Tip: A planning-first approach that maps wind exposure alongside sun angles helps you avoid placing a large shade sail directly in the path of your prevailing afternoon breeze, which is both uncomfortable and hard on the structure.
Wind, Anchors, Building Codes, and When to Hire a Pro
Wind is the primary reason poolside shade structures fail. A shade sail or cantilever umbrella that looks solid on a calm day can become a projectile in a 40 mph gust if the anchoring is wrong.
Anchoring basics:
- Standard market umbrellas need a weighted base of at least 50 pounds for a 9-foot canopy. Cantilever umbrellas require 80–100 pounds of base weight or a bolted anchor to meet typical manufacturer wind-load ratings.
- Shade sails on freestanding posts need posts set in concrete footings. A 4-inch steel post typically requires a footing at least 24 inches deep and 12 inches in diameter, though local soil conditions may require more.
- Permanent pergola and pavilion posts are always bolted into engineered concrete footings. The footing size is determined by the structure’s wind load calculation, which requires a structural engineer or a manufacturer’s stamped drawing.
When a permit is required:
- Any structure with a permanent footing (concrete anchored posts).
- Any roofed structure, regardless of size, in most jurisdictions.
- Any structure with electrical integration (lighting, fans, outlets).
- Any structure attached to the house that affects the building envelope.
Check with your local building department before you start. Permit requirements vary by municipality, and an unpermitted structure can complicate a home sale or insurance claim.
Questions to ask any installer:
- What is the wind-load rating of this structure, and how was it calculated?
- What footing design are you using, and do you have an engineer’s stamp?
- How does water drain from the roof or fabric?
- What is the warranty on the structure and the fabric separately?
- Does this installation require a permit, and will you pull it?
Pro Tip: Set a calendar reminder to inspect your shade structure after every major storm. Check anchor bolts, fabric tension, and hardware connections. A loose bolt caught early costs minutes to fix; a structure that shifts in the next storm can cause real damage.
Typical Costs and Maintenance Expectations for Each Shade Type
Cost ranges below reflect typical installed prices in the U.S. market. DIY installs save labor but not materials.
| Shade Type | Typical Cost Range | Expected Lifespan | Maintenance Frequency | DIY or Pro |
|---|---|---|---|---|
| Market umbrella | $50 | 3–7 years | Seasonal | DIY |
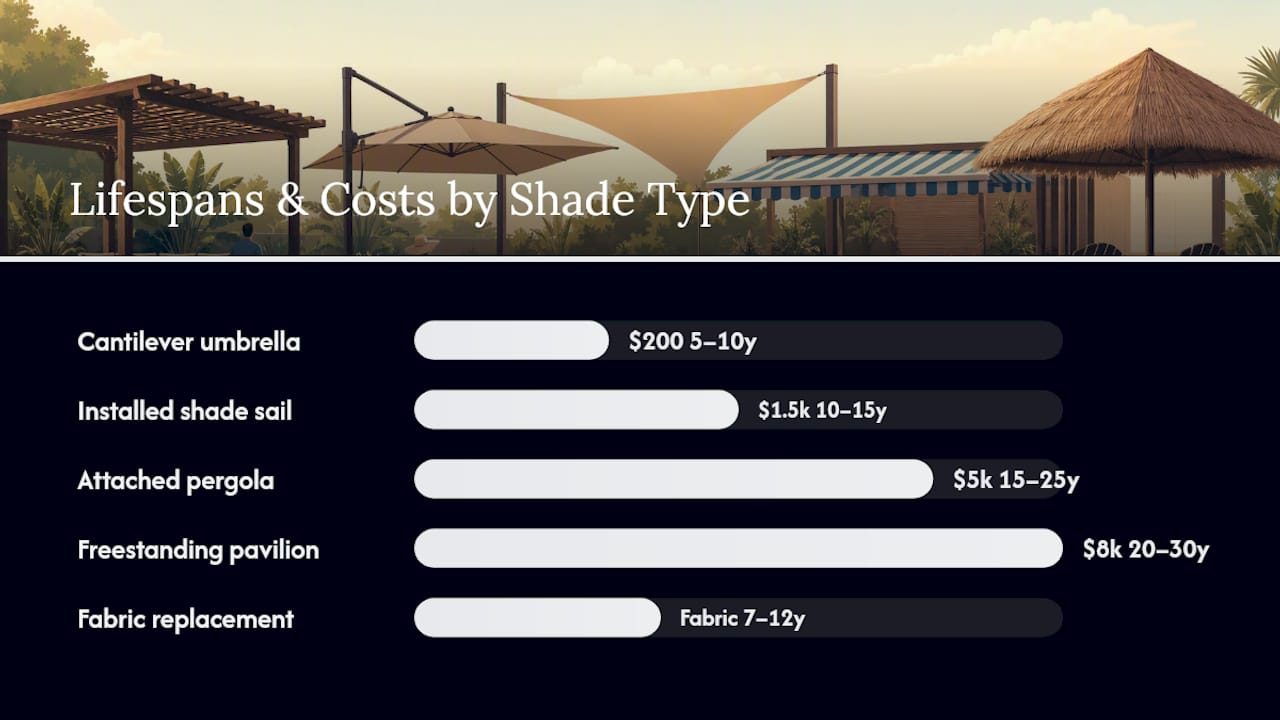
| Cantilever umbrella | $200 | 5–10 years | Seasonal | DIY / Pro anchor |
| Shade sail (DIY posts) | $300 | 5–10 years | Annual tension check | DIY |
| Shade sail (engineered posts) | $1,500 | 10–15 years | Annual | Pro |
| Attached pergola | $5,000 | 15–25 years | Annual inspection | Pro |
| Motorized pergola | $10,000 | 15–20 years | Annual service | Pro |
| Freestanding pavilion | $8,000 | 20–30 years | Annual | Pro |
| Permanent pool house | $30,000 | 30+ years | Annual | General contractor |
Maintenance checklist by season:
- Spring: Inspect all hardware for corrosion, re-tension shade sails, clean fabric with mild soap and water, lubricate pivot points on umbrellas and motorized systems.
- Summer: Check fabric tension monthly during peak wind season; close or remove umbrellas during storms.
- Fall: Deep-clean fabric before storage or winter; inspect footings and anchor bolts; touch up any powder-coat chips on steel frames.
- Winter (mild climates): Leave structures in place but inspect after any unusual weather; store umbrella canopies if temperatures drop below freezing regularly.
Permanent structures require maintenance similar to the pool itself, and using marine-grade materials significantly extends lifespan in high-moisture environments.
Pro Tip: Budget for fabric replacement every 7–12 years on permanent structures, even with quality materials. The frame outlasts the fabric in almost every case. Keeping the frame in good condition means a fabric swap is a fraction of the cost of a full replacement.
A hybrid approach is common and practical: start with cantilever umbrellas for immediate coverage, then add a permanent pergola or pavilion when the budget allows. The umbrellas fill gaps the permanent structure doesn’t cover.
For seasonal storage, factor in the cost of a cover or storage bag for umbrella canopies ($30–$80) and replacement turnbuckles or D-rings for shade sails ($20–$60 per set). These small annual costs add up over a decade but are far cheaper than premature replacement.
How to Choose the Right Shade Solution and What to Ask a Contractor
The decision comes down to five factors, in this order:
- Use case: Are you shading a lounge area, a dining table, the pool entry, or the whole deck? Each has a different best answer.
- Permanence: Do you want to move it, adjust it seasonally, or set it and forget it?
- Budget: Upfront cost and total ownership cost (fabric replacement, maintenance) are both real numbers.
- Mounting options: What anchor points do you have? A house wall, a fence, existing posts, or open ground with no attachment?
- Wind exposure: How exposed is your backyard? A corner lot or elevated yard needs a more robust anchoring solution than a sheltered courtyard.
Questions to ask any contractor before signing:
- What wind-load rating does this structure carry, and is it documented?
- What specific materials are you using for the frame, fabric, and hardware?
- Does this installation require a permit, and who pulls it?
- What is the warranty on labor, the frame, and the fabric separately?
- Can you provide photos or references from similar installs in comparable wind/climate conditions?
- How does water drain from the structure, and does that drainage affect my pool or deck?
- If I want to add lighting or a fan later, is the structure wired or conduit-ready for that?
Comparing quotes fairly:
Expect a detailed quote to break out materials, labor, permit fees, and any engineering costs separately. A quote that bundles everything into one number makes it impossible to compare. Ask for the fabric spec by name (brand and model), the frame material and finish, and the footing design. Common hidden costs include permit fees ($100–$500+), engineering stamps ($300–$800 for a structural drawing), and electrical rough-in if you want lighting.
Pro Tip: Ask for as-built drawings and the fabric manufacturer’s spec sheet at project completion. If you ever need to replace the fabric or a hardware component, you’ll know exactly what to order without guessing.
Integrating shade during the pool build is almost always cleaner and less expensive than adding it later. Footings can be poured at the same time as the pool shell, wiring can be run before the deck is finished, and the whole design reads as intentional rather than added-on.
Why Integrating Shade Into a New Pool Build Makes Sense
The most common regret among pool owners who add shade after the fact is the same: “We wish we’d planned it from the start.” Retrofitting a pergola or pavilion after the pool deck is finished means cutting into concrete, running conduit through finished surfaces, and often compromising the footing depth because the deck is already in the way.
When shade is part of the original pool design, the sequence works cleanly:
- Excavation and pool shell installation.
- Footing pours for shade structure posts (done at the same time as pool equipment pads).
- Conduit and electrical rough-in run before the deck is poured.
- Deck finish applied around the posts, not cut around them later.
- Shade structure erected after the deck cures.
- Lighting, fans, and any HVAC connections made to the pre-run conduit.
Benefits of integrating shade early:
- Footings are engineered alongside the pool structure, so there is no conflict with underground plumbing or the pool shell.
- Wiring is concealed in the deck or posts from day one. No surface conduit, no cutting finished concrete.
- The design reads as a cohesive outdoor room rather than a pool with something bolted on later.
- One contractor coordinates all trades, which simplifies permitting and warranty coverage.
Trade-offs to know:
- Integrating shade adds to the project timeline, typically 2–4 weeks for a pergola or pavilion depending on permit processing.
- It adds to the upfront cost, but the total cost is almost always lower than a retrofit because you avoid the labor of working around a finished deck.
- Permitting for the combined project may be more complex, but a single permit covering pool and shade is simpler than two separate permits filed at different times.
Integrating shade, lighting, and electrical into the pool build from the start yields a more cohesive, resort-style result compared to adding shade later and avoids the cost and disruption of cutting into a finished deck.
Pro Tip: Request as-built drawings that show footing locations, conduit runs, and the fabric spec at project handoff. If you ever need to add a fan, replace the fabric, or extend the structure, those drawings save hours of detective work.
Lighting and Electrical Integration With Shade Structures for Evening Use
A shade structure that goes dark at sunset is only half a backyard feature. The most livable pool areas combine overhead shade with integrated lighting that extends usable hours well into the evening.
Common lighting options for shade structures:
- String lights: The easiest retrofit. Draped across pergola beams or shade sail attachment points, they add warm ambient light with no electrical work beyond a standard outlet. Weatherproof LED string lights rated for outdoor use last several seasons.
- Recessed LED downlights: Installed in pergola beams or pavilion ceilings, these provide clean, directed light over dining or lounge areas. Require conduit and a licensed electrician, but the result looks intentional and permanent.
- Low-voltage LED strip lights: Run along pergola beams or under the top rail of a cabana, these create a soft wash of light that defines the space without harsh glare. Dimmable systems let you shift from bright dining light to ambient evening mood.
- Ceiling fans with integrated lights: A practical addition to any roofed structure. The fan moves air on humid evenings; the light handles illumination. Requires a dedicated circuit and a licensed electrician.
Electrical planning basics:
Any hardwired lighting or fan in a shade structure near a pool falls under the National Electrical Code’s requirements for outdoor and wet-location wiring. In most jurisdictions, this means GFCI-protected circuits, weatherproof junction boxes, and conduit rated for outdoor use. A licensed electrician pulls the permit and does the work. This is not a DIY project.
The cleanest installs run conduit through the posts and beams before the structure is finished. Retrofitting conduit through an assembled pergola is possible but messy. If you are building a new structure, tell the electrician before the posts go up, not after.
For ideas on pairing lighting with other pool add-ons, integrated lighting in a shade structure is one of the highest-return upgrades for evening usability.
Smart controls: Motorized pergola systems often include app-based controls that manage both the louvers and the lighting from one interface. Standalone smart switches (Lutron Caseta, for example) work well for simpler setups where you want dimming and scheduling without a full automation system.
Why Randrswimmingpools Recommends Building Shade Into the Pool Plan
At R and R Swimming Pools, we have seen the difference between a pool project that includes shade from the design phase and one where it gets added two years later. The integrated approach consistently produces a better result: cleaner lines, concealed wiring, footings that don’t conflict with the pool shell, and a backyard that looks like it was designed as a whole rather than assembled in stages.
The backyard pool upgrade examples in our portfolio show what that integration looks like in practice. Shade structures that were planned alongside the pool, with coordinated decking, lighting, and landscaping, read as resort-quality outdoor rooms. The ones added later are functional but rarely achieve the same cohesion.
Our recommendation is straightforward: if you are planning a new pool, bring the shade conversation into the design meeting, not the year after installation. The cost difference is smaller than most homeowners expect, and the result is significantly better.
Randrswimmingpools Builds Shaded Pool Areas From the Ground Up
Permanent shade done right starts with the pool design, not after the deck is poured. Randrswimmingpools handles the full scope: pool shell, footings, electrical rough-in, decking, and shade structure coordination, so you get one contractor, one permit process, and a finished backyard that works as a system.
Whether you are planning a new concrete or fiberglass pool or adding a shade structure to an existing build, the team at Randrswimmingpools can walk you through the options, pull the permits, and deliver a finished result. Start with a free consultation through the inground pool installation guide or get a quote directly from the concrete pool builders page. The conversation is free; the clarity it gives you is worth the call.
Sources
- Sun Shades For Pools — SwimFastLane
- Commercial pool shade structures guide — Zoom Recreation
- Poolside shade setup ideas — SwimmerLiving
