
TL;DR:
- Constructing a pool changing area requires integrating drainage, ventilation, and durable moisture-resistant materials to prevent mold and damage. Proper layout prioritizes unidirectional flow from pool to dry exit, with careful planning of space and zoning to ensure safety and hygiene. Using HDPE or solid-grade laminate panels, stainless steel hardware, and effective airflow systems ensures long-term durability in humid poolside environments.
Pool changing area construction is the process of building a dedicated wet-use space that stays dry, hygienic, and structurally sound despite constant exposure to moisture, pool chemicals, and Florida’s year-round humidity. Unlike a standard bathroom renovation, a poolside changing space must function as an integrated system where drainage, ventilation, layout, and materials all work together. Get any one of those elements wrong and you face mold, standing water, or deteriorating fixtures within a season. This guide walks you through every phase, from design principles to material selection to the construction sequence itself.
What are the essential design principles for pool changing area construction?
The most effective poolside changing layout follows a “village” sequence: changing cubicles, shower zones, and then pool access. Proper routing of foot traffic reduces floor water accumulation by over 50% compared to open-room designs. That single layout decision has a bigger impact on hygiene and safety than almost any material choice you make.
The core principle is unidirectional flow. Wet users move from the pool toward showers, then to changing cubicles, and finally to a dry exit zone. Reversing that sequence, or allowing users to cut across wet and dry zones freely, pushes water into dry storage areas and creates slip hazards. Wet-to-dry flow is not optional in a well-built changing space. It is the structural logic the entire layout depends on.
Space planning matters just as much as flow direction. Benches, lockers, and shower heads need enough clearance between them to prevent bottlenecks when multiple people use the space at once. Privacy screens and partial walls can define zones without blocking airflow or creating dead-end pockets where water collects. For poolside design in Central Florida, the goal is always to move water away from people and dry surfaces as fast as possible.
Key layout principles to follow:
- Place shower zones between the pool deck and the changing cubicles, never at the exit end
- Orient floor drains at the lowest point of each wet zone, not just at the center of the room
- Allow at least 36 inches of clearance in front of lockers and benches for comfortable movement
- Use partial privacy walls that stop 12 inches above the floor to allow water to drain freely
- Position exhaust fans above the shower zone, not above the dry changing area
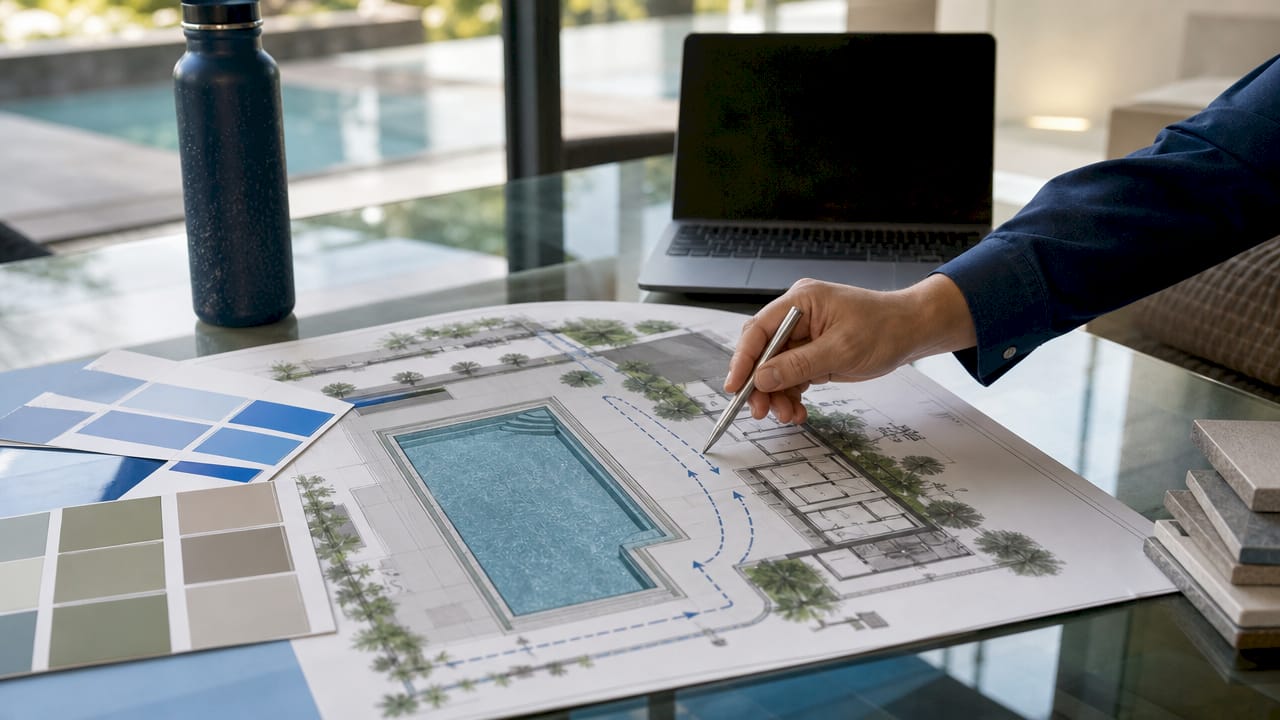
Pro Tip: Design your wet and dry zones on paper before breaking ground. A simple floor plan sketch that shows foot traffic arrows will reveal layout conflicts that are expensive to fix once framing is in place.
Which materials are best for moisture-resistant changing areas?
Material selection is the single biggest factor in long-term durability for any outdoor changing facility. HDPE and solid-grade laminate resist moisture, UV exposure, and corrosion from pool chemicals far better than traditional metal or standard wood-core panels. These materials do not delaminate, warp, or rust, which makes them the industry standard for swimming pool locker design and partition walls.
Here is a ranked list of material choices for each major component:
- Locker and partition panels: High-density polyethylene (HDPE) or solid phenolic panels. Both are non-porous and will not absorb moisture even after years of daily use.
- Hardware and fasteners: Stainless steel hardware is the only acceptable choice. Plated metals show rust stains within 12–24 months in humid, chemical-exposed environments.
- Flooring: Porcelain tile with a slip-resistant surface rating of R11 or higher, or poured rubber flooring with integrated drainage channels. Both handle constant wet traffic without degrading.
- Wall finishes: Epoxy-coated concrete block or large-format porcelain tile. Grout lines should be sealed with epoxy grout to prevent mold growth.
- Benches: HDPE slat benches mounted on stainless steel brackets. Avoid wood, even treated wood, in direct wet zones.
Ventilation fixtures deserve the same attention as structural materials. Locker doors need built-in louvers to allow air circulation inside each unit. The room itself needs exhaust fans sized to cycle the full air volume every few minutes. High humidity and pool chemicals create rapid mold and odor buildup without active airflow. In Central Florida, where outdoor humidity rarely drops below 60%, this is not a feature you can skip to save money.
Pro Tip: Ask your supplier for the material’s chemical resistance rating before purchasing. HDPE and solid phenolic panels should carry documentation showing resistance to chlorine and bromine exposure, the two most common pool sanitizers.
What steps do you need to take before construction begins?
Preparation determines whether your project runs on schedule or stalls at the permit stage. The table below outlines the key prerequisite steps and what each one involves.
| Preparation Step | What It Involves |
|---|---|
| Site assessment | Evaluate existing drainage, slope, and proximity to pool equipment |
| Local permits | Pull building permits from your county; Florida requires permits for enclosed structures |
| Code review | Check Florida Building Code Section 454 for aquatic facility requirements |
| Material procurement | Order HDPE panels, stainless steel hardware, and waterproof flooring with lead time in mind |
| Contractor consultation | Engage a pool construction specialist familiar with wet-zone systems |
| Timeline planning | Budget 20 days minimum for a modular fit-out; full renovations can run 36 weeks or more |
The timeline range is wide because scope varies dramatically. A modular locker and bench installation in an existing covered space is a very different project from building a freestanding changing structure with plumbing, electrical, and HVAC from scratch. Knowing your scope before you start prevents budget surprises mid-project.
Proper floor drainage is the most overlooked prerequisite. If your site does not have adequate slope and drain infrastructure before framing begins, adding it later means tearing up finished flooring. Have a licensed plumber assess the drainage capacity of your site before any construction starts.
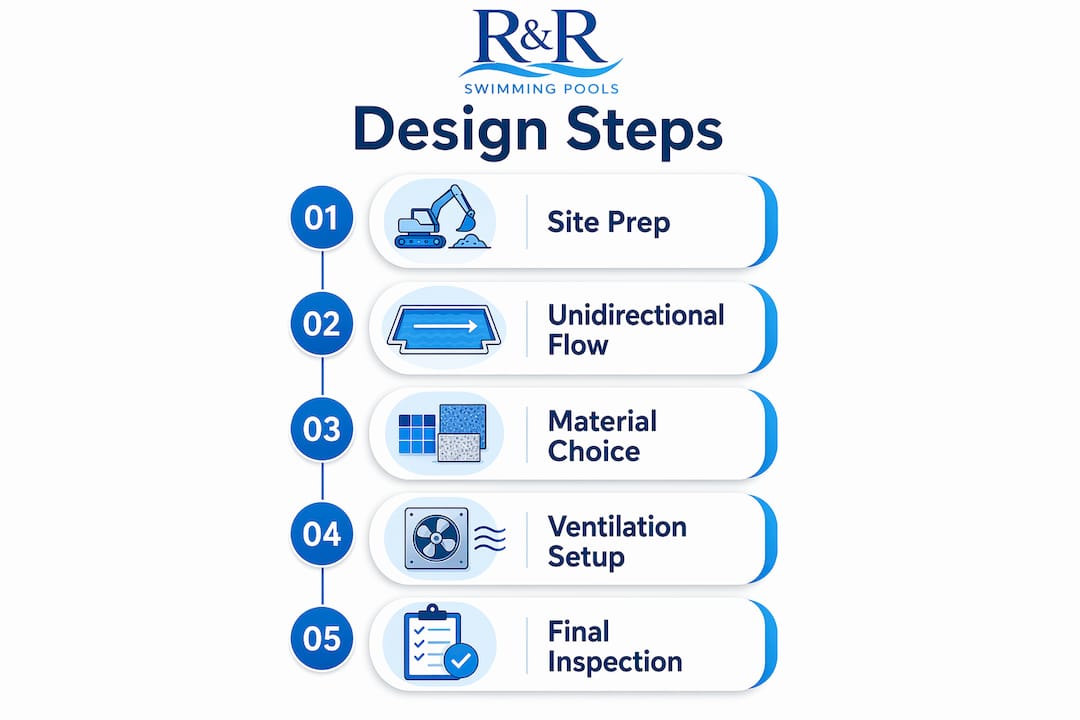
How to execute pool changing area construction step by step
A clear construction sequence prevents costly rework. Follow these steps in order.
- Mark wet and dry zones. Use chalk lines or spray paint to define the exact boundaries of each zone on the slab. Every subsequent decision references these lines.
- Install drainage infrastructure. Set linear drains or floor drains at the correct slope before any flooring goes down. The standard slope for wet areas is 1/8 inch per foot toward the drain.
- Frame structural elements. Use pressure-treated lumber or steel stud framing for walls. Apply a waterproof membrane to all framed walls in wet zones before any finish material goes on.
- Install waterproof flooring. Lay porcelain tile or poured rubber flooring starting from the drain and working outward. Use epoxy grout throughout.
- Mount lockers and partitions. Install HDPE or solid phenolic panels on stainless steel mounting hardware. Benches and fixed furniture should sit on non-porous bases with a slight standoff from the floor to allow flood cleaning underneath.
- Install showers and plumbing fixtures. Use pressure-balanced shower valves and stainless steel or brass fittings. Mount showerheads at a height that keeps spray contained within the shower zone.
- Set up ventilation. Install exhaust fans above the shower zone and ensure locker doors have louvers. Wire fans to a humidity sensor so they activate automatically when moisture levels rise.
- Apply sealants and finishes. Seal all wall-to-floor transitions with silicone rated for pool chemical exposure. Apply a penetrating sealer to any grout lines not already filled with epoxy grout.
Key finishing details that homeowners often skip:
- Caulk every penetration where pipes or conduit pass through walls
- Install a threshold or recessed channel at the wet-to-dry zone transition to stop water migration
- Test all drains with a full-volume water pour before installing any furniture or fixtures
- Label circuit breakers for all GFCI outlets in the changing area
What common pitfalls should you avoid during construction?
The most expensive mistakes in changing room renovation happen when wet and dry zones are not properly separated. Ignoring wet-to-dry transit flow leads to standing water, slip hazards, and water damage in dry storage areas. A threshold strip or recessed drain channel at the zone boundary costs very little during construction. Fixing water damage to lockers and flooring after the fact costs far more.
Ventilation is the second most common failure point. Homeowners often size exhaust fans for a standard bathroom rather than a pool-adjacent wet room. A changing space attached to a pool in Central Florida needs fans rated for continuous high-humidity operation, not residential bathroom fans. Under-ventilated spaces develop mold inside locker cavities and behind wall panels within one season.
Changing rooms in pool environments are integrated wet-use systems. Lockers, flooring, ventilation, and layout must work together to manage moisture and hygiene. Treating any one element as an afterthought creates problems that compound over time.
Additional pitfalls to avoid:
- Skipping the waterproof membrane on framed walls in wet zones
- Using standard drywall anywhere in the changing space, even in the dry zone
- Installing benches flush to the floor without a standoff, which traps moisture and causes rot
- Choosing fixtures based on price rather than chemical resistance ratings
- Failing to account for Florida’s afternoon rain when planning roof drainage and exterior wall sealing
Schedule flexibility matters too. Unexpected site conditions, such as discovering poor soil drainage or existing plumbing conflicts, are common in Central Florida’s sandy soil. Build at least a two-week buffer into your timeline for any full construction project.
Key Takeaways
Successful pool changing area construction requires treating the space as an integrated wet-use system where drainage, ventilation, materials, and layout all depend on each other.
| Point | Details |
|---|---|
| Unidirectional flow is non-negotiable | Route users from pool to shower to changing cubicle to dry exit to prevent water migration. |
| HDPE and solid phenolic win on durability | These materials resist pool chemicals, UV, and moisture far better than metal or wood alternatives. |
| Ventilation prevents mold | Exhaust fans and locker louvers must be sized for high-humidity pool environments, not standard bathrooms. |
| Drainage infrastructure comes first | Install drains and waterproof membranes before any flooring or framing to avoid costly teardowns. |
| Standoff furniture extends lifespan | Benches and lockers mounted with a floor gap allow flood cleaning and prevent hidden rot. |
What I’ve learned from designing wet-zone spaces in Florida
Most homeowners treat a pool changing area like a slightly tougher bathroom renovation. That framing leads to predictable mistakes. The real mental model is closer to a commercial kitchen: every surface, every fixture, and every seam has to assume it will be wet, chemically exposed, and heavily used on a daily basis.
The insight that changes everything is understanding ventilation and drainage as one system, not two separate line items. I have seen beautifully tiled changing rooms with perfect drainage that still developed mold within a year because the exhaust fan was undersized. The moisture had nowhere to go vertically, so it settled into locker cavities and grout lines. Drainage handles the floor. Ventilation handles the air. Both have to be right.
Accessibility is the other area where homeowners consistently underplan. Future-proof changing rooms incorporate features like wider doorways, grab bars, and adjustable fixtures that serve aging family members and guests with mobility needs. Adding these features during construction costs a fraction of what a retrofit costs later.
The homeowners who get the best results are the ones who plan their changing area at the same time they plan their pool, not as an afterthought once the pool is finished. Integrated planning means the drainage, electrical, and plumbing runs can be coordinated from the start. That coordination saves money and produces a better result.
— Results
Randrswimmingpools can help you build it right
Planning a poolside changing space alongside a new pool installation is exactly the kind of project R and R Swimming Pools has been handling across Central Florida since 1985. The team brings the same wet-zone expertise to changing area construction that it applies to every custom pool installation it completes.
Whether you are starting from scratch or updating an existing space, Randrswimmingpools offers consultations that cover drainage integration, material selection, and layout planning specific to your property. The inground pool installation guide is a strong starting point for homeowners who want to understand how changing area construction fits into the broader pool project. Contact Randrswimmingpools for a free estimate and get a plan built around your backyard, your budget, and Central Florida’s climate.
FAQ
What is the most important factor in pool changing area construction?
Unidirectional wet-to-dry flow is the single most critical design factor. Routing users from the pool through showers to changing cubicles and then to a dry exit prevents water from migrating into dry storage zones and reduces floor water accumulation significantly.
What materials work best for poolside changing room lockers?
HDPE and solid-grade laminate panels are the industry standard for pool locker design. They resist moisture, UV exposure, and pool chemicals without warping, rusting, or delaminating over time.
How long does pool changing area construction take?
Timeline depends on scope. A modular interior fit-out can be completed in as little as 20 days, while a full facility construction or major renovation often takes 36 weeks or more.
Do I need a permit to build a pool changing area in Central Florida?
Yes. Florida requires building permits for enclosed structures, and pool-adjacent facilities fall under Florida Building Code Section 454 for aquatic facilities. Always pull permits before construction begins.
How do I prevent mold in a poolside changing room?
Install exhaust fans sized for continuous high-humidity operation and specify locker doors with built-in ventilation louvers. Fans should be wired to a humidity sensor so they run automatically whenever moisture levels rise above the threshold.
